How to Set Facebook Login and Get User Information

How to Set Facebook Login and Get User Information


Hey,
This is gonna be a kind of tutorial which I will show you how to implement Facebook Login Button and how to get user information from facebook login.

1. Register App

First we need to register our application to Facebook. Login your FB account on : https://developers.facebook.com/apps/
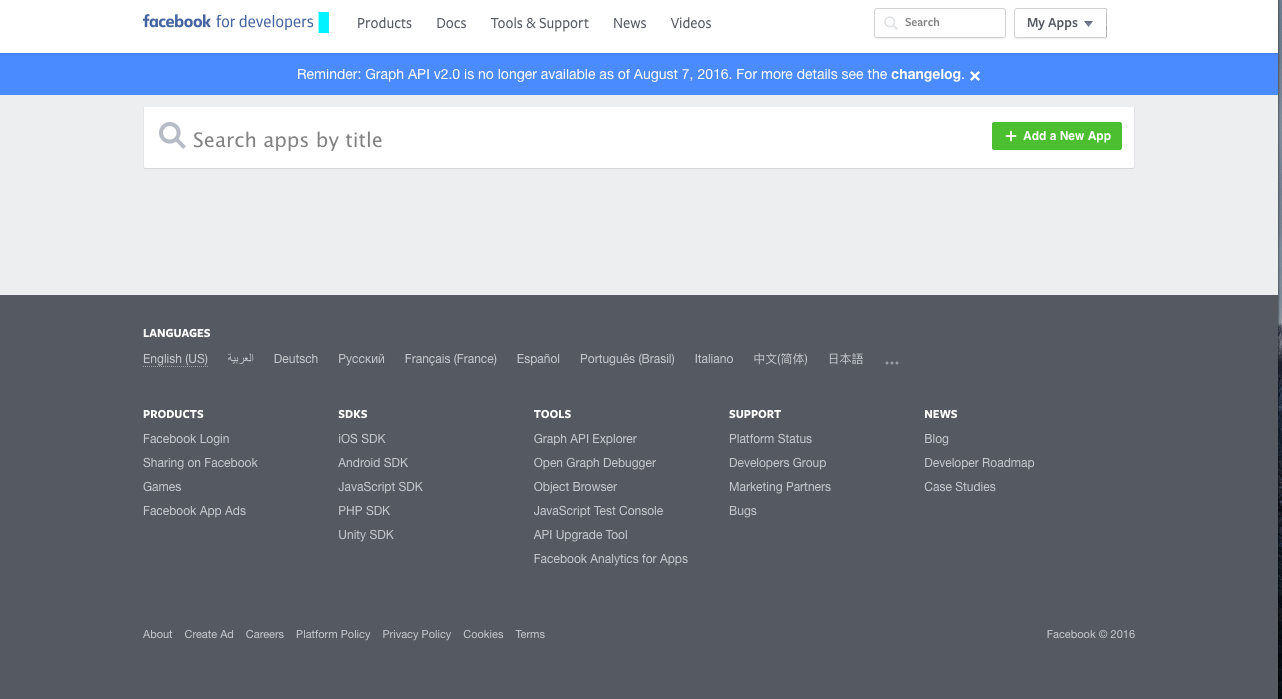
Click “Add a New App” button and a box will be appeared.
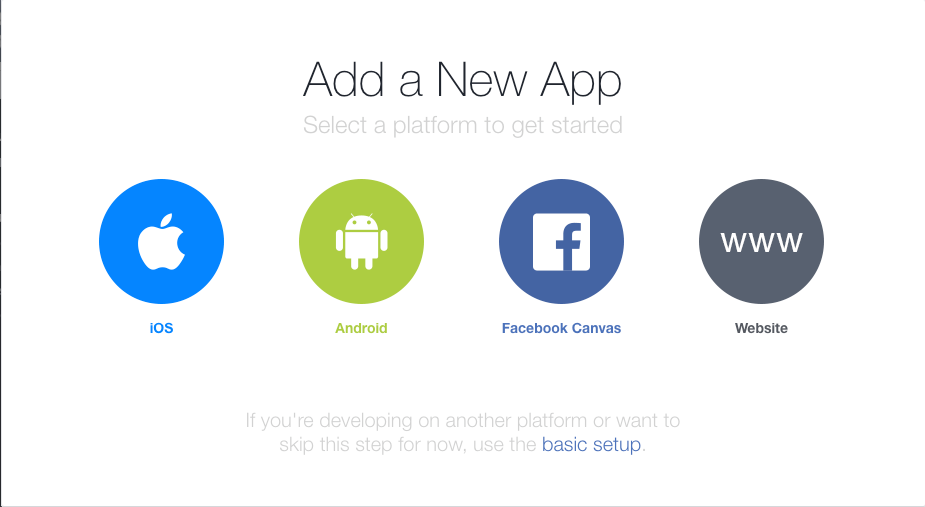
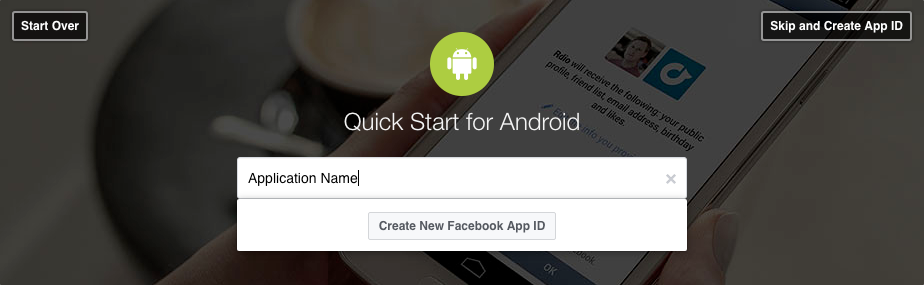
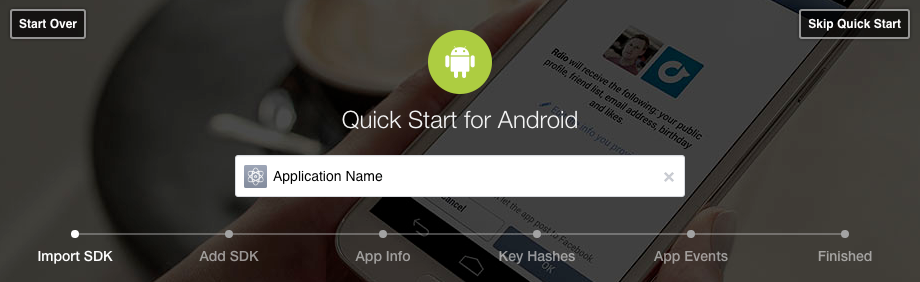
Select Android and you will see that screen. In this screen, write your application name and click Create New Facebook App ID button.
Next we will fill Display NameContact Email and select our application category.
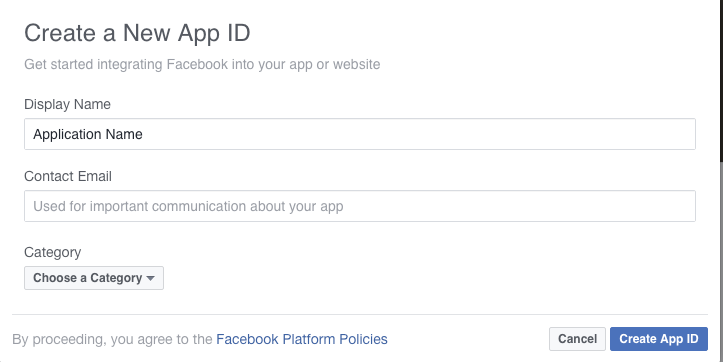
After you fill them, click Create App ID.

Finally we can start Quick Start for Android Tour. I suggest you to follow every step. Once you done, you never need to check your back later.

2. Add Facebook SDK to Project

We need to add FB SDK to our project, at Android Studio app -> build.gradle let’s add our gradle segment.
repositories {
        mavenCentral()
    }
In dependencies, we need to add :
compile ‘com.facebook.android:facebook-android-sdk:[4,5)’

3. Add Facebook App ID

1. Open our strings.xml file, at Android Studio: /app/src/main/res/values/strings.xml.
2. Add a new string with the name facebook_app_id containing the value of your Facebook App ID:
<string name="facebook_app_id">your_facebook_app_id</string>
3. Add fb login protocol scheme, you just need to add this as a new string :
// if your App ID is 1234567, you should use fb1234567
<string name="fb_login_protocol_scheme">fbAPP_ID</string>
4. Open AndroidManifest.xml.
5. Add a uses-permission element to the manifest:
<uses-permission android:name="android.permission.INTERNET"/>
6. Add a meta-data element to the application element:
<application android:label="@string/app_name" ...>
    
    <meta-data android:name="com.facebook.sdk.ApplicationId" android:value="@string/facebook_app_id"/>
    
</application>
7. Add fb protocol scheme to the Facebook Login Activity :
<activity
    android:name=".LoginActivity"
    android:exported="true"
    android:screenOrientation="portrait">
    <intent-filter>
        <data android:scheme="@string/fb_login_protocol_scheme" />
    </intent-filter>
</activity>
Now, we need to fill this part on FB Quick Start Tour. We need to write our app’s package and MainClass’ package name.
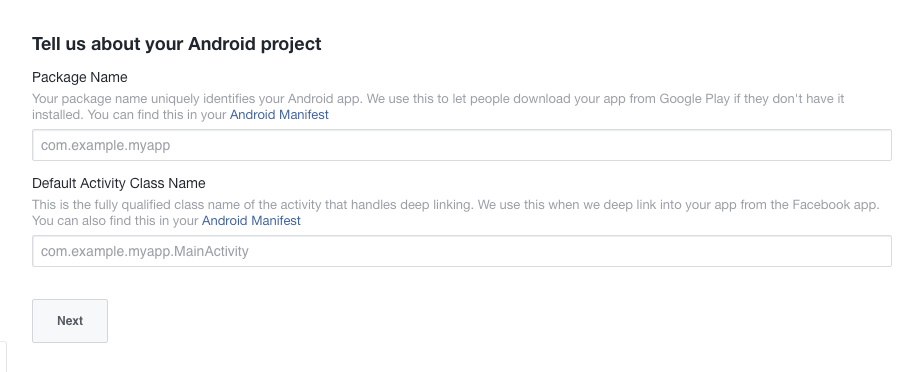
After we finish these, let’s click Next button.

4. How to get Key Hashes

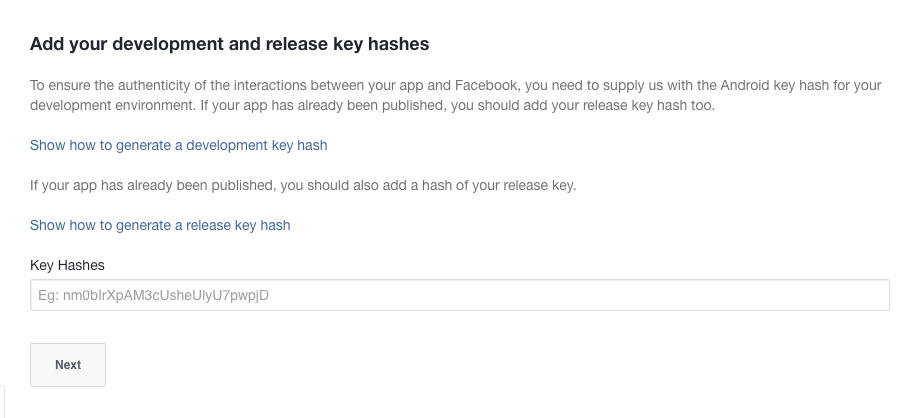
After we click Next, we have one more step to go. We need a hash key.
On Mac, open Terminal and copy this code segment :
keytool -exportcert -alias androiddebugkey -keystore ~/.android/debug.keystore | openssl sha1 -binary | openssl base64
On Windows, open CMD and copy this code segment :
keytool -exportcert -alias androiddebugkey -keystore %HOMEPATH%\.android\debug.keystore | openssl sha1 -binary | openssl base64
After you enter this code, it might ask your password, enter and you will get your hash key. Copy it and enter the Key Hashes and click Next.

5. Enable Single Sign On for App

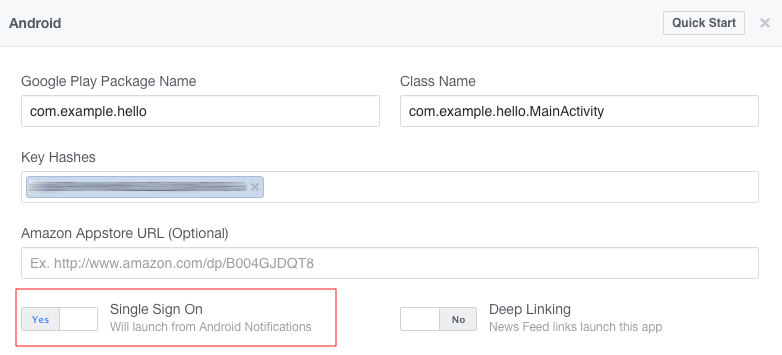
Now, enter : developers.facebook.com/ and select our new app. It will open its Dashboard. On the left menu, you can see Settings.
As you can see in the below image, you need to open “Single Sign On” button.

6. Initialise Facebook SDK

Now, we need to go our Android Studio and initialise FB SDK. OnCreate part we need to call sdkInitialize BEFORE setContentView;

UPDATE : We do not need to use .sdkInitialize.

From Facebook :
The Facebook SDK is now auto initialized on Application start. If you are using the Facebook SDK in the main process and don’t need a callback on SDK initialization completion you can now remove calls to FacebookSDK.sdkInitialize. If you do need a callback, you should manually invoke the callback in your code.
@Override
public void onCreate() {
    super.onCreate();// DO NOT need .sdkInitialize anymore, it is auto initialized.  
// Facebook SDK init
// FacebookSdk.sdkInitialize(getApplicationContext());
setContentView(R.layout.activity_main);}

7. Add the Facebook Login Button on XML

Simply copy it :
<com.facebook.login.widget.LoginButton
    android:id="@+id/facebook_login"
    android:layout_width="match_parent"
    android:layout_height="wrap_content"
    android:paddingTop="10dp"
    android:paddingBottom="10dp"
    android:layout_gravity="center_horizontal"
    android:layout_below="@+id/logo"
    android:layout_centerHorizontal="true"
    android:layout_marginTop="30dp"
    />
Do not forget: You can customize FB Login button!

8. Perfil Class


I just created this class for saving FB login Access Token and user information, of course, you can use another method.

/**
 * Created by Kuray(FreakyCoder) on 25/08/16.
 */
public class PrefUtil {

    private Activity activity;

    // Constructor
    public PrefUtil(Activity activity) {
        this.activity = activity;
    }

    public void saveAccessToken(String token) {
        SharedPreferences prefs = PreferenceManager.getDefaultSharedPreferences(activity);
        SharedPreferences.Editor editor = prefs.edit();
        editor.putString("fb_access_token", token);
        editor.apply(); // This line is IMPORTANT !!!
    }


    public String getToken() {
        SharedPreferences prefs = PreferenceManager.getDefaultSharedPreferences(activity);
        return prefs.getString("fb_access_token", null);
    }

    public void clearToken() {
        SharedPreferences prefs = PreferenceManager.getDefaultSharedPreferences(activity);
        SharedPreferences.Editor editor = prefs.edit();
        editor.clear();
        editor.apply(); // This line is IMPORTANT !!!
    }

    public void saveFacebookUserInfo(String first_name,String last_name, String email, String gender, String profileURL){
        SharedPreferences prefs = PreferenceManager.getDefaultSharedPreferences(activity);
        SharedPreferences.Editor editor = prefs.edit();
        editor.putString("fb_first_name", first_name);
        editor.putString("fb_last_name", last_name);
        editor.putString("fb_email", email);
        editor.putString("fb_gender", gender);
        editor.putString("fb_profileURL", profileURL);
        editor.apply(); // This line is IMPORTANT !!!
        Log.d("MyApp", "Shared Name : "+first_name+"\nLast Name : "+last_name+"\nEmail : "+email+"\nGender : "+gender+"\nProfile Pic : "+profileURL);
    }

    public void getFacebookUserInfo(){
        SharedPreferences prefs = PreferenceManager.getDefaultSharedPreferences(activity);
        Log.d("MyApp", "Name : "+prefs.getString("fb_name",null)+"\nEmail : "+prefs.getString("fb_email",null));
    }


}


You can change names or do not use Logd parts.

9. Register Callback Creation and Read Permissions

We need a registerCallback object to get FB Login is success, failed or even cancelled.
  1. We have to create it : ( Do not forget, you need to create it before setContentView ), also do not forget to init your facebook login button !
// Facebook SDK init
FacebookSdk.sdkInitialize(getApplicationContext());
callbackManager = CallbackManager.Factory.create();
setContentView(R.layout.activity_login);loginButton = (LoginButton) findViewById(R.id.facebook_login);
2. We need to get read permissions from user.
loginButton.setReadPermissions(Arrays.asList(
        "public_profile", "email"));
You need to use this little code segment BEFORE loginButton.registerCallBack() method !

10. How to Get Facebook User Data

I just wrote a method which gets User’s FB data, if you need any question at there, please feel free to write a comment :)

    private Bundle getFacebookData(JSONObject object) {
        Bundle bundle = new Bundle();

        try {
            String id = object.getString("id");
            URL profile_pic;
            try {
                profile_pic = new URL("https://graph.facebook.com/" + id + "/picture?type=large");
                Log.i("profile_pic", profile_pic + "");
                bundle.putString("profile_pic", profile_pic.toString());
            } catch (MalformedURLException e) {
                e.printStackTrace();
                return null;
            }

            bundle.putString("idFacebook", id);
            if (object.has("first_name"))
                bundle.putString("first_name", object.getString("first_name"));
            if (object.has("last_name"))
                bundle.putString("last_name", object.getString("last_name"));
            if (object.has("email"))
                bundle.putString("email", object.getString("email"));
            if (object.has("gender"))
                bundle.putString("gender", object.getString("gender"));


            prefUtil.saveFacebookUserInfo(object.getString("first_name"),
                    object.getString("last_name"),object.getString("email"),
                    object.getString("gender"), profile_pic.toString());

        } catch (Exception e) {
            Log.d(TAG, "BUNDLE Exception : "+e.toString());
        }

        return bundle;
    }

How to adjust the icon size of FAB Button

Hey,
Unfortunately, when you add an src icon into the FAB button its size becomes too small so, we need to adjust it again by a little simple code.
First, we need to use 24 dp icon which means 24x24 icons.
Then, let’s set the simple code segment :
android:scaleType=”center”
And, Taa-data :) Now, your icon is visible :P
If you have any question, ask me :)

How to make EditText read/copy but not editable [ Perfect Solution ]

Hey,
I have a perfect solution to make your EditText just read and copy but users cannot edit or delete it.
These two little code segment will let your editText just readable and copyable and not even editable.
<EditText
            android:id="@+id/editText"
            android:layout_width="match_parent"
            android:layout_height="wrap_content"
            android:inputType="none"
            android:textIsSelectable="true" />
android:inputType=”none” android:textIsSelectable=”true”
So simple and so useable. If you have a question, ask me :)


How to detect if using touches and drags out of button region

Hey,
I’m going to explain how to detect and change a TextView’s color when touches and drags out its region.
This little code segment will save your day!
 next_button.setOnTouchListener(new View.OnTouchListener() {
            @Override
            public boolean onTouch(View v, MotionEvent event) {
                switch (event.getAction()) {
                    case MotionEvent.ACTION_DOWN:
                        next_button.setTextColor(getResources().getColor(R.color.myGreyMaterial));
                        rect = new Rect(v.getLeft(), v.getTop(), v.getRight(), v.getBottom());
                        return true;
                    case MotionEvent.ACTION_UP:
                        if (rect != null
                                && !rect.contains(v.getLeft() + (int) event.getX(),
                                v.getTop() + (int) event.getY())) {
                            // The motion event was outside of the view, handle this as a non-click event
                            next_button.setTextColor(getResources().getColor(R.color.colorPrimary));
                            return true;
                        }
                        // The view was clicked.
                        next_button.setTextColor(getResources().getColor(R.color.colorPrimary));
                        startActivity(new Intent(getApplicationContext(),RegisterActivity.class));
                        return true;
                }
                return false;
            }
        });


First you need to initialize a Recy object;
private Rect rect;
In the MotionEvent.ACTION_DOWN part, you need to calculate rect
rect = new Rect(v.getLeft(), v.getTop(), v.getRight(), v.getBottom());
It will get the region’s where the region is.
Then, in the MotionEvent.ACTION_UP part, you need to check that touches is in region or not;
if (rect != null
        && !rect.contains(v.getLeft() + (int) event.getX(),
        v.getTop() + (int) event.getY()))
Then, ta-daa :) You can use that touch detection :)
If you have any question, ask me :)

How to remove ListView Seperator in XML Layout and programatically

Hey,
Firstly, let’s look at how to remove listview seperator in XML Layout;
This little code segment removes your listView’s seperators. Actually dividerHeight = “0dp” is unnecessary but still use it :)
android:dividerHeight="0dp"
android:divider="@null"
If you want this in programmatically, then you need to use this code segment. Remember, you need to use your listview initialition rather than “getListView()” part.
getListView().setDividerHeight(0);
getListView().setDivider(null);
If you have any question, ask me :)

How to Z-Index

Hey,
I’ve had a problem which was a layout z-index problem. When I click my search button, some layout objects did not make that transparency and they were just on the top side of the background.
Fortunately, I found an extremely basic solution. ( I did not know that Android layout works like that :) )
So, Android xml layout works the orders of Views. If you want to make an object on the top side, it should be on the lowest side on the xml file.

How to Check Internet Availability

Hey,
This code segment lets you check there is a network connection or not.
public boolean isNetworkConnected() {
        ConnectivityManager connectivityManager = (ConnectivityManager) context.getSystemService(Context.CONNECTIVITY_SERVICE);

        Log.d("MyApp", "Network Connection checking..");

        NetworkInfo activeNetworkInfo = connectivityManager.getActiveNetworkInfo();
        return activeNetworkInfo != null && activeNetworkInfo.isConnected();
    }
If you need to check internet availability more than one places or more than one Activities, you’d better to create a Class which is InternetAvailability and use it via this class easily.
Do not forget to add permission in AndroidManifest:
<uses-permission android:name="android.permission.ACCESS_NETWORK_STATE" />
If you have a question, ask me :)

How to pass multiple primitive parameters to AsyncTask

Hey,
Sometimes passing a parameter is really hard on AsyncTask. Especially you want to pass multiple primitive as parameters.
Firstly, you need a POJO that will assist you to keep your primitive parameters.
Here is the example of a POJO for AsyncTask :
public class MyTaskParams {
    String method;
    String username;
    String password;
    String email;
    String gender;
    int age;
    String country;
    int daily_goal;
    String user_login;

    public MyTaskParams(String method, String username, String password, String email, String gender, int age, String country, int daily_goal) {
        this.method = method;
        this.username = username;
        this.password = password;
        this.email = email;
        this.gender = gender;
        this.age = age;
        this.country = country;
        this.daily_goal = daily_goal;
    }

    public MyTaskParams(String method,String user_login, String password){
        this.method = method;
        this.user_login = user_login;
        this.password = password;
    }


}

Now, let’s adapt this pojo to AsyncTask.
public class BackgroundTask extends AsyncTask<MyTaskParams,Void,String> {

    Context context;
    public BackgroundTask(Context context) {
        this.context = context;
    }

    @Override
    protected void onPreExecute() {
        super.onPreExecute();
    }

    @Override
    protected String doInBackground(MyTaskParams... params) {
       
        String method             = params[0].method;
        if(method.equals("Register")) {
            String username = params[0].username;
            String password = params[0].password;
            String email = params[0].email;
            String gender = params[0].gender;
            int age = params[0].age;
            String country = params[0].country;
            int daily_goal = params[0].daily_goal;
            Log.d("MyApp", "**** Information ***** \n" + username + "\n" + password + "\n" + email + "\n" + gender + "\n" + age + "\n" + country + "\n" + daily_goal);
        }
    }
}


Remember that, this is just an example of AsyncTask with multiple parameters. You need to transform these code segments on your own code :)
Tip : You should not forget while you are using extra pojo for AsyncTask, your params object contains each value inside so you need to get all with “params[0]”.. Do not confuse with : params[0],params[1] for each value. You just need to use params[0].valuename that’s all :)
If you have a question, ask me :)

How Vibrating Device

Hey,

This little code segment will let you vibrate your device whenever or wherever you want.

  Vibrator v = (Vibrator) this.getApplicationContext().getSystemService(Context.VIBRATOR_SERVICE);
        // Vibrate for 1000 milliseconds
        v.vibrate(1000);

For example, i used this code segment in my notification. First device vibrates then notification comes after that.
Simple and elegant :)
If you have a question, ask me :)

How to Get Current Date by Formatting

Hey,
Firstly, this code segment lets you the exact integer number of the current day. Therefore, you can get the switch-case check to do whatever you want on an exact day.

 Calendar calendar = Calendar.getInstance();
            int day = calendar.get(Calendar.DAY_OF_WEEK);

            switch (day){
                case Calendar.SUNDAY:
                    //Your code
                    break;
                case Calendar.MONDAY:
                    //Your code
                    break;
                ...
            }

Moreover, this code segment gives you the formatted current date. You can shape your format to change : “yyyy-MM-dd” part.
  SimpleDateFormat df = new SimpleDateFormat("yyyy-MM-dd");
            String now = df.format(new Date());

How to Close Pop-Keyboard


This little code segment let you to close and prevent pop-keyboard.

                //Preventing & Closing Pop-Keyboard Immediately
                InputMethodManager inputManager = (InputMethodManager)
                        getSystemService(Context.INPUT_METHOD_SERVICE);

                inputManager.hideSoftInputFromWindow(getCurrentFocus().getWindowToken(),
                        InputMethodManager.HIDE_NOT_ALWAYS);

If you have a question, ask me :)

How to Fit ImageView in RecyclerView

Hey,
This code segment provides you to fit your imageVilew full scale in RecyclerView.
   holder.imageView.setImageResource(R.drawable.deadpool);
            holder.imageView.setScaleType(ImageView.ScaleType.FIT_XY);

So simple to use this code segment with setImageResource in “static” segment.
If you have any question, ask me :)

Colorful Snackbar

Hey,

This code segment helps you to customize snackbar. You can create amazing stylish snackbar.

/**
 * Created by freakycoder on 09/12/15.
 */

public class ColorfulSnackbar {

    private static final int red = Color.parseColor("#f41515");
    private static final int green = 0xff4caf50;
    private static final int blue = 0xff2195f3;
    private static final int orange = 0xffffc107;
    private static final int myBlue = Color.parseColor("#002487");

    private static View getSnackBarLayout(Snackbar snackbar) {
        if (snackbar != null) {
            return snackbar.getView();
        }
        return null;
    }

    private static Snackbar colorSnackBar(final Snackbar snackbar, int colorId) {
        View snackBarView = getSnackBarLayout(snackbar);
        if (snackBarView != null) {
            snackBarView.setBackgroundColor(myBlue);
            // Changing action button text color
            View sbView = snackbar.getView();
            TextView textView = (TextView) sbView.findViewById(android.support.design.R.id.snackbar_text);
            textView.setTextColor(Color.WHITE);
        }
        return snackbar;
    }

    public static Snackbar info(Snackbar snackbar) {
        return colorSnackBar(snackbar, blue);
    }

    public static Snackbar warning(Snackbar snackbar) {
        return colorSnackBar(snackbar, orange);
    }

    public static Snackbar alert(Snackbar snackbar) {
        return colorSnackBar(snackbar, red);
    }

    public static Snackbar confirm(Snackbar snackbar) {
        return colorSnackBar(snackbar, green);
    }
}

USAGE :
//Default snackbar creation
Snackbar snackbar = Snackbar.make(findViewById(R.id.mainRelativeLayout), "Snackbar", Snackbar.LENGTH_LONG);//Your custom snackbar
ColorfulSnackbar.info(snackbar).show();
And that’s it. It is so simple and clear.
If you have any question, ask me :)

How to getText From Custom ListView

This code segment lets you to get text from your Custom ListView which one you click.

  listView.setOnItemClickListener(new AdapterView.OnItemClickListener() {
            @Override
            public void onItemClick(AdapterView<?> parent, View view, int position, long id) {

                TextView tv = (TextView) view.findViewById(R.id.country_name);
                String country = tv.getText().toString();

            }
        }


I think this is really a simple code segment i think, if you do not understand anything, feel free to ask me :)
Happy Coding :)

How to Get All Country Names

Hey,


This code segment will get you all country names.
//Initializing Country List
    final List<Country> countryList=new ArrayList<>();

    public void fillCountryList(){
        String[] countries = Locale.getISOCountries();

        int j = 0;
        // Loop each country
        for(int i = 0; i < countries.length; i++) {

            String country = countries[i];
            Locale locale = new Locale("en", country);

            // Get the country name by calling getDisplayCountry()
            String countryName = locale.getDisplayCountry();

            // Printing the country name on the console
            countryList.add(new Country(countryName));
            j++;
        }
        Log.d("MyApp", "Total Country # : " + j);
    }

You can use this code segment even in your Android application without any problem.
If you cannot understand how it is working, feel free to ask me :)

How to Remove RecyclerView’s Scroll Effect

This code segment provides you to control your RecyclerView’s scroll effect. You can open or close it.
Gist:

// How to close scrollMode in RecyclerView
<android.support.v7.widget.RecyclerView
   android:id="@+id/ssm_recyclerView"
   android:layout_width="match_parent"
   android:layout_height="wrap_content"
   android:overScrollMode="never" 
/>

Markdown:
// How to close scrollMode in RecyclerView
<android.support.v7.widget.RecyclerView
   android:id="@+id/ssm_recyclerView"
   android:layout_width="match_parent"
   android:layout_height="wrap_content"
   android:overScrollMode="never" 
/>
Basically, you need to add android:overScrollMode=“never” line to your RecyclerView.
If you cannot get what scroll effect means this is it :

Prevent Auto Popping Keyboard


This code segment let you to prevent auto popping keyboard. If you’re using editText in your layout, auto popping keyboard would you really angry. Therefore, get rid of it :)
// Prevent to auto popping keyboard
this.getWindow().setSoftInputMode(WindowManager.LayoutParams.SOFT_INPUT_STATE_ALWAYS_HIDDEN);

You should use this code at your activity’s @OnCreate method.
If you have a question, ask me :)

How to extract filename from Uri?

Now, we can extract filename with and without extension :) You will convert your bitmap to uri and get the real path of your file. Now w...