How to Set Facebook Login and Get User Information
Hey,
This is gonna be a kind of tutorial which I will show you how to implement Facebook Login Button and how to get user information from facebook login.
1. Register App
First we need to register our application to Facebook. Login your FB account on : https://developers.facebook.com/apps/
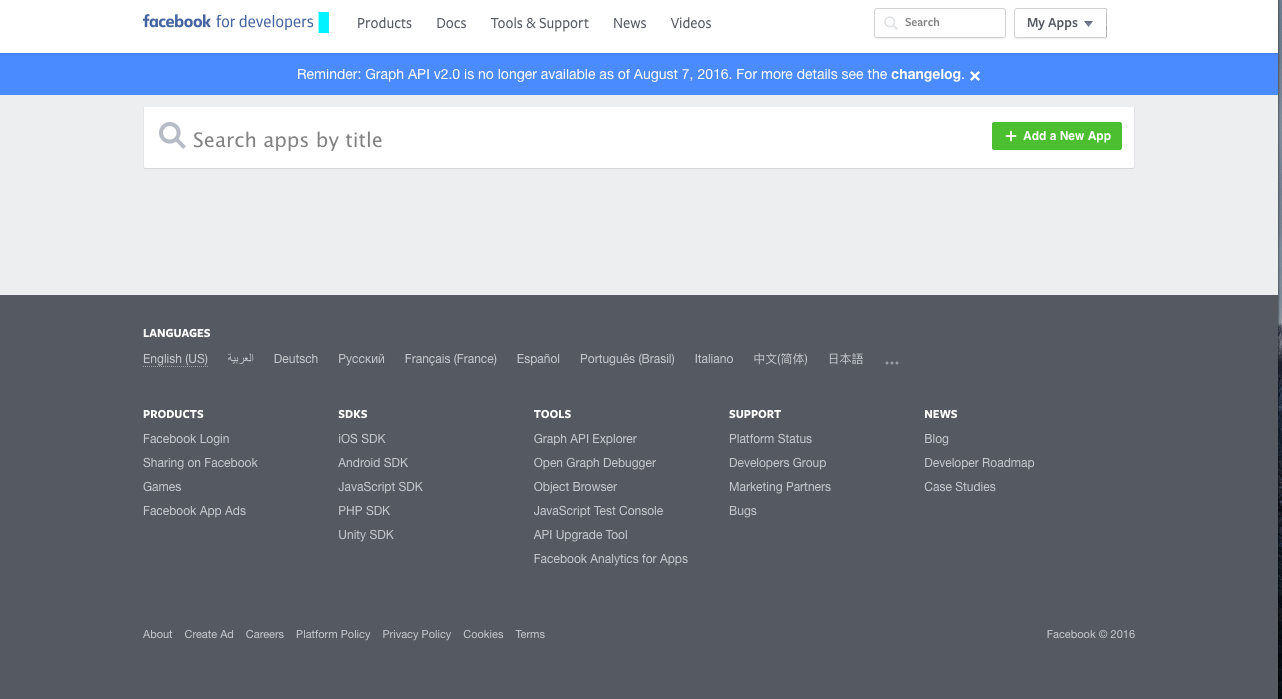
Click “Add a New App” button and a box will be appeared.
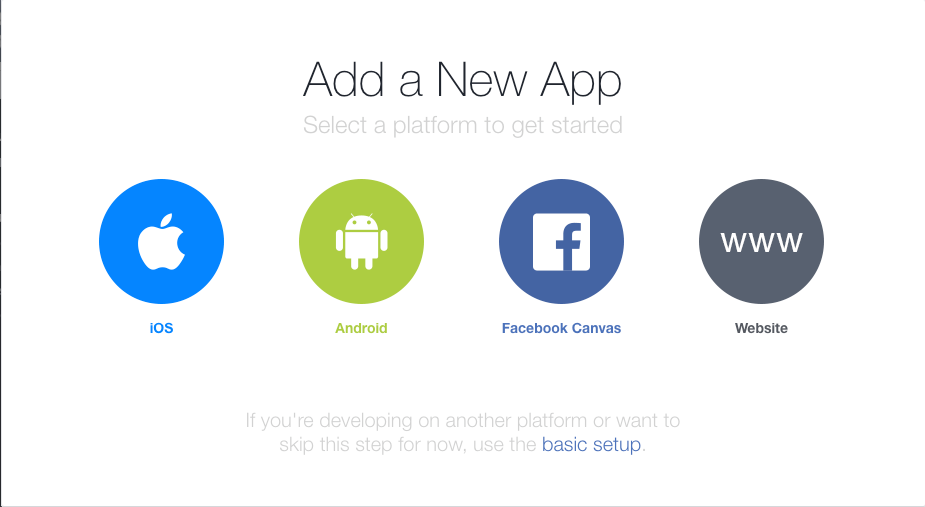
Select Android and you will see that screen. In this screen, write your application name and click Create New Facebook App ID button.

Next we will fill Display Name, Contact Email and select our application category.
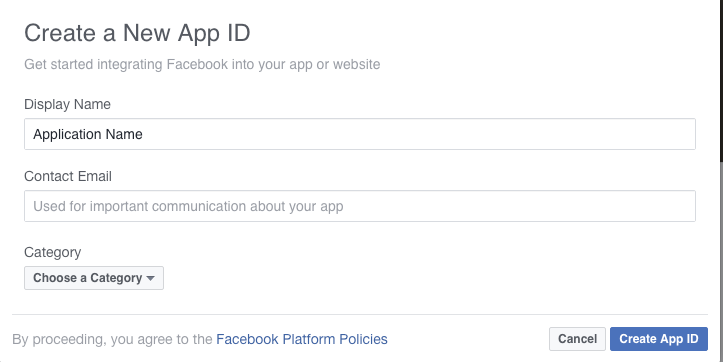
After you fill them, click Create App ID.
Finally we can start Quick Start for Android Tour. I suggest you to follow every step. Once you done, you never need to check your back later.

2. Add Facebook SDK to Project
We need to add FB SDK to our project, at Android Studio app -> build.gradle let’s add our gradle segment.
repositories {
        mavenCentral()
    }
In dependencies, we need to add :
compile ‘com.facebook.android:facebook-android-sdk:[4,5)’
3. Add Facebook App ID
1. Open our strings.xml file, at Android Studio: /app/src/main/res/values/strings.xml.
2. Add a new string with the name facebook_app_id containing the value of your Facebook App ID:
<string name="facebook_app_id">your_facebook_app_id</string>
3. Add fb login protocol scheme, you just need to add this as a new string :
// if your App ID is 1234567, you should use fb1234567
<string name="fb_login_protocol_scheme">fbAPP_ID</string>
4. Open AndroidManifest.xml.
5. Add a uses-permission element to the manifest:
<uses-permission android:name="android.permission.INTERNET"/>
6. Add a meta-data element to the application element:
<application android:label="@string/app_name" ...>

    <meta-data android:name="com.facebook.sdk.ApplicationId" android:value="@string/facebook_app_id"/>

</application>
7. Add fb protocol scheme to the Facebook Login Activity :
<activity
    android:name=".LoginActivity"
    android:exported="true"
    android:screenOrientation="portrait">
    <intent-filter>
        <data android:scheme="@string/fb_login_protocol_scheme" />
    </intent-filter>
</activity>
Now, we need to fill this part on FB Quick Start Tour. We need to write our app’s package and MainClass’ package name.
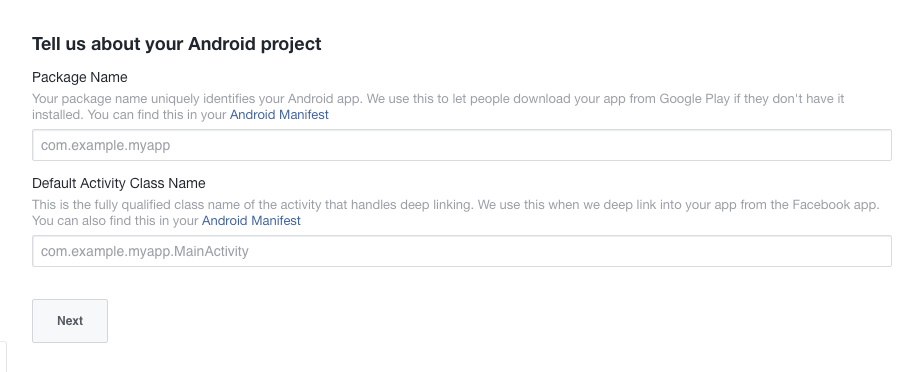
After we finish these, let’s click Next button.
4. How to get Key Hashes
After we click Next, we have one more step to go. We need a hash key.
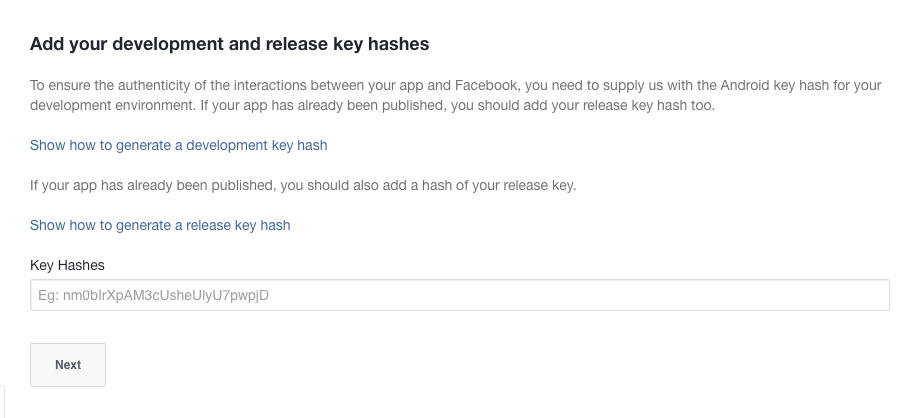
On Mac, open Terminal and copy this code segment :
keytool -exportcert -alias androiddebugkey -keystore ~/.android/debug.keystore | openssl sha1 -binary | openssl base64
On Windows, open CMD and copy this code segment :
keytool -exportcert -alias androiddebugkey -keystore %HOMEPATH%\.android\debug.keystore | openssl sha1 -binary | openssl base64
After you enter this code, it might ask your password, enter and you will get your hash key. Copy it and enter the Key Hashes and click Next.
5. Enable Single Sign On for App
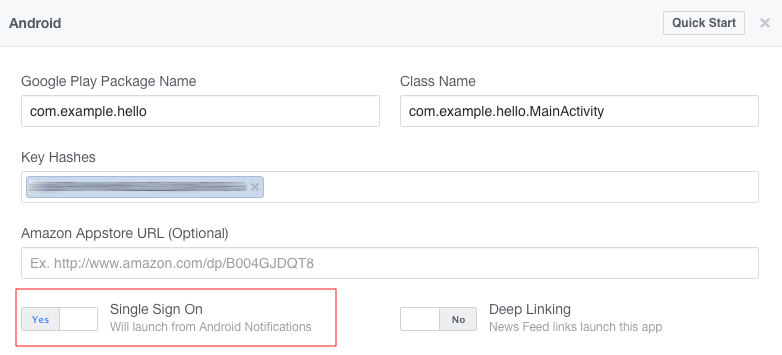
Now, enter : developers.facebook.com/ and select our new app. It will open its Dashboard. On the left menu, you can see Settings.
As you can see in the below image, you need to open “Single Sign On” button.
6. Initialise Facebook SDK
Now, we need to go our Android Studio and initialise FB SDK. OnCreate part we need to call sdkInitialize BEFORE setContentView;
UPDATE : We do not need to use .sdkInitialize.
From Facebook :
The Facebook SDK is now auto initialized on Application start. If you are using the Facebook SDK in the main process and don’t need a callback on SDK initialization completion you can now remove calls to FacebookSDK.sdkInitialize. If you do need a callback, you should manually invoke the callback in your code.
@Override
public void onCreate() {
    super.onCreate();// DO NOT need .sdkInitialize anymore, it is auto initialized.
// Facebook SDK init
// FacebookSdk.sdkInitialize(getApplicationContext());
setContentView(R.layout.activity_main);}
7. Add the Facebook Login Button on XML
Simply copy it :
<com.facebook.login.widget.LoginButton
    android:id="@+id/facebook_login"
    android:layout_width="match_parent"
    android:layout_height="wrap_content"
    android:paddingTop="10dp"
    android:paddingBottom="10dp"
    android:layout_gravity="center_horizontal"
    android:layout_below="@+id/logo"
    android:layout_centerHorizontal="true"
    android:layout_marginTop="30dp"
    />
Do not forget: You can customize FB Login button!
8. Perfil Class
I just created this class for saving FB login Access Token and user information, of course, you can use another method.
/**
 * Created by Kuray(FreakyCoder) on 25/08/16.
 */
public class PrefUtil {

    private Activity activity;

    // Constructor
    public PrefUtil(Activity activity) {
        this.activity = activity;
    }

    public void saveAccessToken(String token) {
        SharedPreferences prefs = PreferenceManager.getDefaultSharedPreferences(activity);
        SharedPreferences.Editor editor = prefs.edit();
        editor.putString("fb_access_token", token);
        editor.apply(); // This line is IMPORTANT !!!
    }


    public String getToken() {
        SharedPreferences prefs = PreferenceManager.getDefaultSharedPreferences(activity);
        return prefs.getString("fb_access_token", null);
    }

    public void clearToken() {
        SharedPreferences prefs = PreferenceManager.getDefaultSharedPreferences(activity);
        SharedPreferences.Editor editor = prefs.edit();
        editor.clear();
        editor.apply(); // This line is IMPORTANT !!!
    }

    public void saveFacebookUserInfo(String first_name,String last_name, String email, String gender, String profileURL){
        SharedPreferences prefs = PreferenceManager.getDefaultSharedPreferences(activity);
        SharedPreferences.Editor editor = prefs.edit();
        editor.putString("fb_first_name", first_name);
        editor.putString("fb_last_name", last_name);
        editor.putString("fb_email", email);
        editor.putString("fb_gender", gender);
        editor.putString("fb_profileURL", profileURL);
        editor.apply(); // This line is IMPORTANT !!!
        Log.d("MyApp", "Shared Name : "+first_name+"\nLast Name : "+last_name+"\nEmail : "+email+"\nGender : "+gender+"\nProfile Pic : "+profileURL);
    }

    public void getFacebookUserInfo(){
        SharedPreferences prefs = PreferenceManager.getDefaultSharedPreferences(activity);
        Log.d("MyApp", "Name : "+prefs.getString("fb_name",null)+"\nEmail : "+prefs.getString("fb_email",null));
    }


}
9. Register Callback Creation and Read Permissions
We need a registerCallback object to get FB Login is success, failed or even cancelled.
- We have to create it : ( Do not forget, you need to create it before setContentView ), also do not forget to init your facebook login button !
// Facebook SDK init FacebookSdk.sdkInitialize(getApplicationContext()); callbackManager = CallbackManager.Factory.create(); setContentView(R.layout.activity_login);loginButton = (LoginButton) findViewById(R.id.facebook_login);2. We need to get read permissions from user.loginButton.setReadPermissions(Arrays.asList( "public_profile", "email"));You need to use this little code segment BEFORE loginButton.registerCallBack() method !
10. How to Get Facebook User Data
I just wrote a method which gets User’s FB data, if you need any question at there, please feel free to write a comment :)private Bundle getFacebookData(JSONObject object) { Bundle bundle = new Bundle(); try { String id = object.getString("id"); URL profile_pic; try { profile_pic = new URL("https://graph.facebook.com/" + id + "/picture?type=large"); Log.i("profile_pic", profile_pic + ""); bundle.putString("profile_pic", profile_pic.toString()); } catch (MalformedURLException e) { e.printStackTrace(); return null; } bundle.putString("idFacebook", id); if (object.has("first_name")) bundle.putString("first_name", object.getString("first_name")); if (object.has("last_name")) bundle.putString("last_name", object.getString("last_name")); if (object.has("email")) bundle.putString("email", object.getString("email")); if (object.has("gender")) bundle.putString("gender", object.getString("gender")); prefUtil.saveFacebookUserInfo(object.getString("first_name"), object.getString("last_name"),object.getString("email"), object.getString("gender"), profile_pic.toString()); } catch (Exception e) { Log.d(TAG, "BUNDLE Exception : "+e.toString()); } return bundle; }


